Crosley Record Player User Manual: A Comprehensive Guide
Welcome! This manual provides detailed instructions for optimal use of your Crosley record player‚ ensuring a delightful listening experience with your vinyl collection.
Crosley has a rich history of bringing music to life‚ evolving from radio manufacturing to becoming a beloved name in record players. Today‚ Crosley offers a diverse range of turntables‚ blending vintage aesthetics with modern technology. These players cater to both seasoned audiophiles and newcomers to the vinyl world.
Whether you’re rediscovering classic albums or exploring new artists‚ a Crosley record player provides a unique and engaging listening experience. This manual will guide you through setup‚ operation‚ and maintenance‚ ensuring years of enjoyment. Explore the warmth and authenticity of vinyl with your new Crosley turntable!
Understanding Your Crosley Model
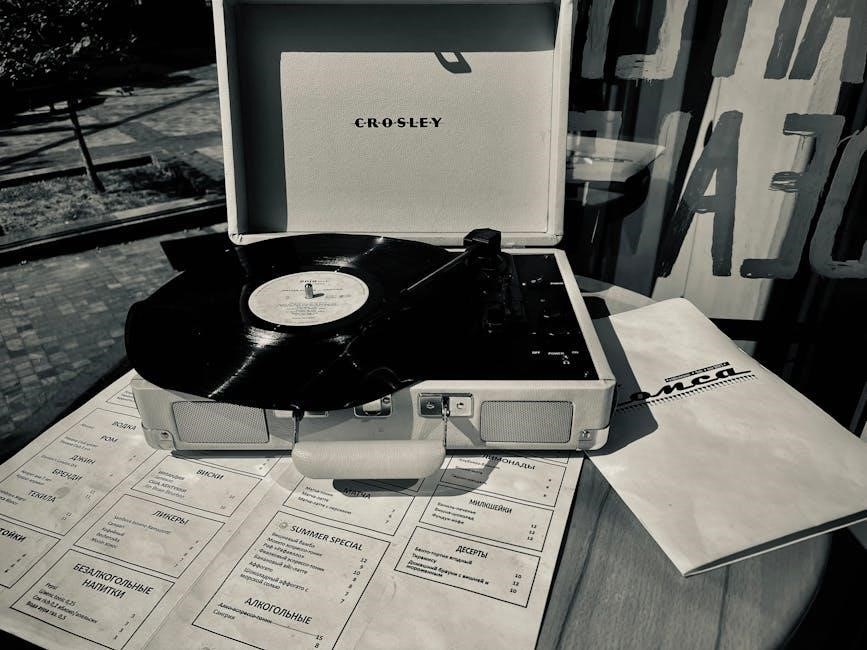
Crosley record players come in various designs – suitcase models for portability‚ classic cabinet styles for home décor‚ and all-in-one systems with built-in speakers. Before you begin‚ identify your specific model number‚ usually found on the underside of the unit or in the original packaging.
Each model features unique components and functionalities. Familiarize yourself with the layout of your turntable‚ noting the location of the power switch‚ volume control‚ and connectivity options. Understanding these features will enhance your overall experience and allow you to fully utilize your Crosley record player’s capabilities.
Unboxing and Initial Setup
Carefully unpack your Crosley record player and all included accessories. Verify that all components listed in the packaging inventory are present. Before connecting to power‚ inspect the turntable platter‚ tonearm‚ and needle for any shipping damage. Gently remove any protective packaging from these parts.
Place the record player on a stable‚ level surface‚ away from direct sunlight and excessive dust. Connect the power adapter to the unit and a suitable power outlet. Ensure proper grounding if applicable. Your Crosley is now ready for initial setup and operation – enjoy the journey into vinyl!
Components and Features
Explore the key elements! This section details the turntable‚ speaker system‚ connectivity (Bluetooth‚ AUX‚ RCA)‚ and control panel for a complete understanding.
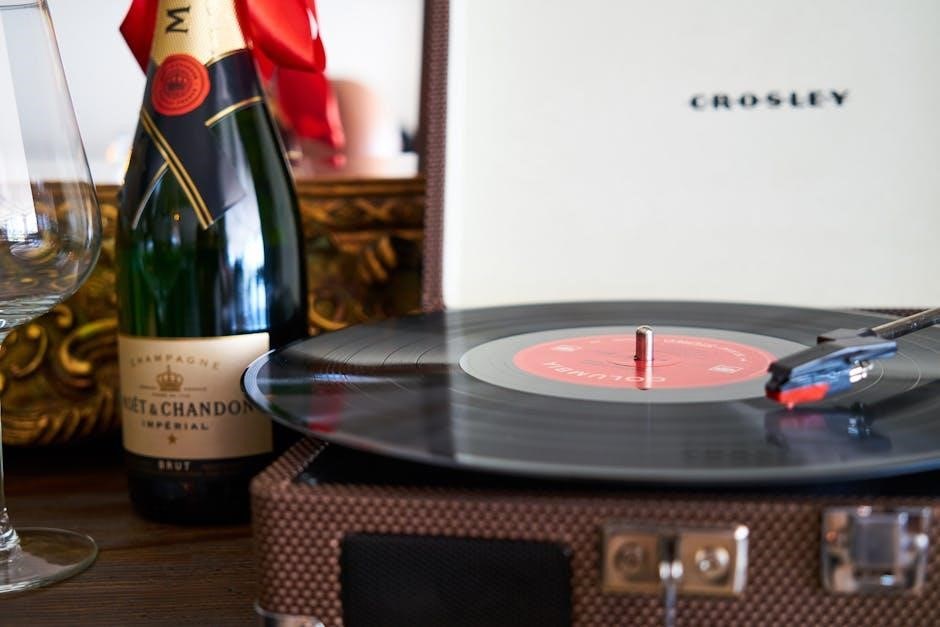
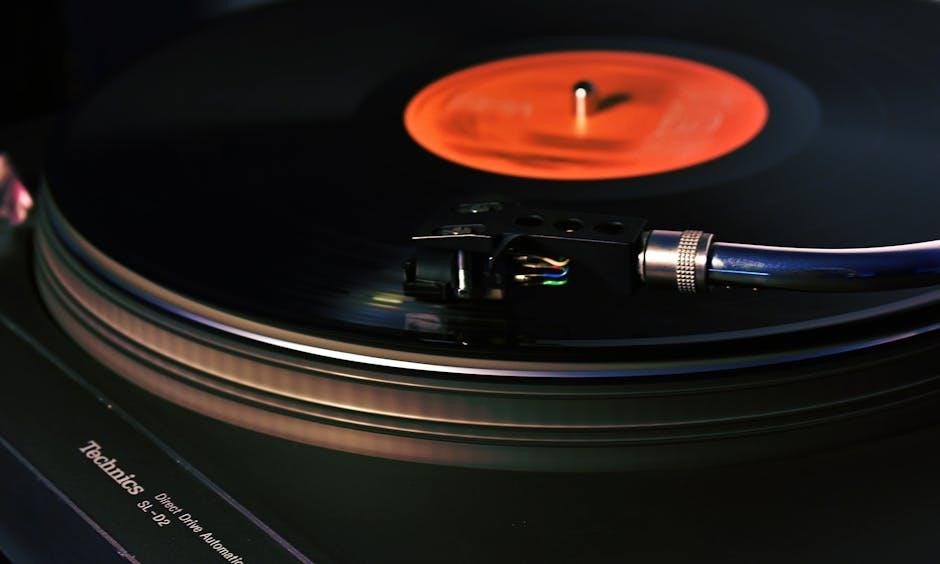
Turntable Components
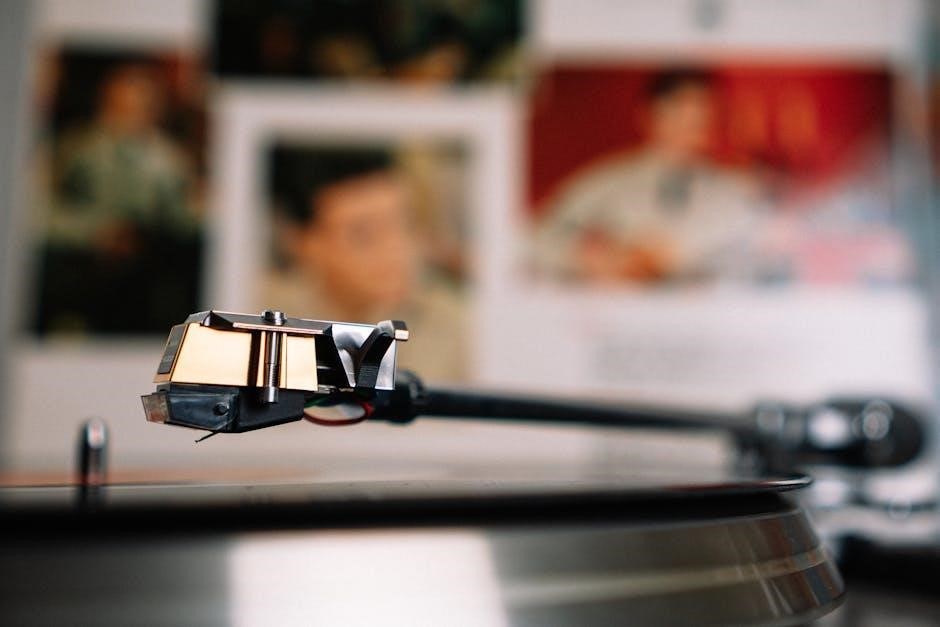
The turntable’s core consists of the platter‚ where records are placed for playback. A crucial element is the tonearm‚ housing the cartridge and needle‚ responsible for reading the grooves. The cartridge converts physical vibrations into electrical signals.
Essential parts include the anti-skate control‚ minimizing uneven wear‚ and the tracking force adjustment‚ optimizing needle pressure. The spindle ensures record stability‚ while the dust cover protects against debris. Understanding these components is vital for proper operation and maintenance‚ ensuring optimal sound quality and extending the lifespan of your Crosley record player.
Speaker System Overview
Your Crosley record player features a built-in speaker system designed for convenient‚ all-in-one operation. These speakers deliver sound directly‚ eliminating the need for external audio equipment in many cases. The speaker placement is optimized for balanced audio distribution‚ though positioning can be adjusted for personal preference.

For enhanced audio‚ consider utilizing the RCA outputs to connect to external speakers. The integrated system provides sufficient volume for casual listening‚ but external speakers unlock a richer‚ more immersive sound experience. Understanding the speaker capabilities allows you to tailor the audio to your environment.
Connectivity Options (Bluetooth‚ AUX‚ RCA)
Your Crosley record player offers versatile connectivity. Bluetooth enables wireless streaming from smartphones and tablets‚ expanding your listening options beyond vinyl. The AUX input allows connection of external devices like MP3 players via a 3.5mm cable. RCA outputs provide a wired connection to external speakers or a home stereo system for superior sound quality.
Utilizing these options enhances your audio experience. Bluetooth offers convenience‚ AUX provides compatibility‚ and RCA delivers premium fidelity. Experiment with each connection type to discover the best sound for your setup and preferences‚ maximizing the player’s potential.
Control Panel Explained
The control panel features essential functions for operation. The power/volume knob controls both on/off and audio level. The auto-stop button halts playback at the record’s end. The speed selector adjusts playback for 33 1/3‚ 45‚ and 78 RPM records. Bluetooth pairing buttons initiate wireless connections.
Familiarize yourself with each control for seamless operation. Adjust volume for optimal listening‚ utilize auto-stop to prevent damage‚ and select the correct speed for your vinyl. Understanding these features unlocks the full potential of your Crosley record player‚ ensuring a satisfying experience.
Operation Instructions
Begin your vinyl journey by following these simple steps! Power on‚ carefully place your record‚ adjust the volume‚ and enjoy the rich‚ warm sound.
Powering On and Off
Initiating Operation: Locate the power switch‚ typically found on the rear panel of your Crosley record player. Gently toggle the switch to the “On” position. You should observe an indicator light illuminating‚ confirming power activation. Some models feature an auto-off function for energy conservation.
Safe Shutdown Procedure: To power down your record player‚ return the power switch to the “Off” position. Always ensure the player is completely switched off when not in use‚ or before performing any maintenance. This prevents potential damage and prolongs the lifespan of your device. Disconnecting the power cord is also recommended for extended periods of inactivity.
Playing Records
Record Placement: Gently place your vinyl record onto the turntable platter‚ ensuring it’s centered. Utilize the spindle to secure the record in position. Carefully remove any protective sleeves to prevent scratching the vinyl surface.
Initiating Playback: Move the tonearm to the beginning of the record. Lower the tonearm using the cueing lever‚ initiating playback. Adjust the volume to your desired level using the volume control knob. Enjoy the rich‚ warm sound of your favorite vinyl records! Remember to handle records with care to maintain their quality.
Adjusting the Volume
Volume Control: Locate the volume control knob on your Crosley record player’s control panel. Rotate the knob clockwise to increase the volume and counter-clockwise to decrease it. Begin with a low volume setting and gradually increase it to your preferred listening level.
Optimal Listening: Avoid excessively high volumes to prevent distortion and potential damage to the speakers or your ears. Fine-tune the volume to achieve a clear and balanced sound. Remember‚ optimal volume depends on the recording and your listening environment.
Using the Auto-Stop Function
Auto-Stop Feature: Your Crosley record player is equipped with an auto-stop function‚ designed to automatically stop the turntable at the end of a record side. This prevents continuous rotation and potential damage to both the record and the stylus.
Activation & Operation: The auto-stop function is typically enabled by default. Ensure the auto-stop lever is in the ‘ON’ position. When a record finishes playing‚ the tonearm will automatically lift and the turntable will stop rotating. If it doesn’t‚ check the lever’s position.
Advanced Features & Troubleshooting
Explore further! This section details Bluetooth pairing‚ AUX/RCA connections‚ needle replacement‚ and solutions for common issues like skipping or poor sound.
Bluetooth Pairing Guide
Connecting Wirelessly: To pair your Crosley record player with a Bluetooth-enabled device‚ first ensure the player is in Bluetooth mode – typically activated via a dedicated button. Next‚ on your smartphone‚ tablet‚ or other device‚ enable Bluetooth and search for available devices. Your Crosley player should appear in the list‚ often identified by its model number. Select it to initiate pairing.
You may be prompted for a pairing code; if so‚ enter “0000” (four zeros). Once successfully connected‚ you can stream audio wirelessly from your device to the record player’s speakers. Remember to maintain a reasonable distance between the devices for a stable connection.
AUX Input Usage
Connecting External Devices: The AUX input allows you to connect external audio sources‚ like smartphones or MP3 players‚ to your Crosley record player. Locate the AUX input jack – typically a 3.5mm port – on the back of the unit. Use a standard 3.5mm audio cable to connect the output of your external device to this jack.
Once connected‚ select the “AUX” input mode on your Crosley player using the source selection button. The audio from your external device will then play through the record player’s speakers. Adjust the volume on both your device and the record player for optimal sound levels.
RCA Output Connection
Connecting to External Speakers: The RCA outputs on your Crosley record player enable connection to external stereo systems or powered speakers for enhanced audio quality. Locate the RCA output jacks – typically red and white – on the back of the unit. Use a standard RCA audio cable to connect these jacks to the corresponding inputs on your external audio system.
Ensure your external speakers are powered on and set to the appropriate input source. The audio signal from the record player will then be routed through your external speakers. Adjust volume levels on both devices for desired sound.
Needle Replacement Instructions
Maintaining Sound Quality: Regularly replacing the needle (stylus) is crucial for optimal sound and preventing damage to your vinyl records. Gently unplug your Crosley record player before beginning. Locate the stylus holder – often a small plastic piece – on the end of the tonearm. Carefully remove the old stylus by gently pulling it straight out.
Align the new stylus with the holder and gently push it in until it clicks. Avoid excessive force. Proper stylus alignment ensures accurate tracking and minimizes record wear. A worn stylus can degrade sound quality and damage your records.
Troubleshooting Common Issues (Skipping‚ Sound Quality)
Addressing Playback Problems: If your record skips‚ ensure the player is on a level surface and the tracking force is appropriately adjusted. A dirty needle can also cause skipping; gently clean it with a stylus brush. For distorted sound‚ check the volume level and ensure the record is clean. Verify RCA or AUX connections are secure.
If Bluetooth pairing fails‚ restart both the player and your device. Low sound quality might indicate a worn stylus – consider replacement. Persistent issues may require contacting Crosley customer support for assistance.
Cleaning and Maintenance
Preserving Your Player: Regularly dust your Crosley record player with a soft‚ dry cloth. Avoid using liquids directly on the unit; Clean records with a carbon fiber brush before each play to remove dust and debris‚ preventing damage to the stylus. Periodically inspect the stylus for wear and tear; replace it when necessary for optimal sound quality.
Store records upright in a cool‚ dry place. Avoid exposing the player to extreme temperatures or humidity. Proper care extends the lifespan of both your record player and your cherished vinyl collection.
Technical Specifications
Detailed Specs: This section outlines crucial technical details‚ including power requirements‚ turntable speeds (33 1/3‚ 45‚ 78 RPM)‚ speaker output‚ and physical dimensions.
Power Requirements
Understanding Power Needs: Your Crosley record player is designed for standard household electrical systems. Most models operate on 120V AC‚ 60Hz power. Always verify your local voltage matches the player’s specifications‚ found on the unit’s base or in the included documentation.
Using an incorrect voltage can cause damage and void the warranty. The player typically consumes a low amount of power‚ around 15-25 watts during operation. Ensure the power outlet is easily accessible and avoid using extension cords if possible. If an extension cord is necessary‚ use a heavy-duty cord rated for the player’s power consumption.
Turntable Speed (33 1/3‚ 45‚ 78 RPM)
Selecting the Correct Speed: Crosley record players support three primary playback speeds: 33 1/3 RPM for LPs (long-playing albums)‚ 45 RPM for singles‚ and 78 RPM for older shellac records. Proper speed selection is crucial for accurate audio reproduction and preventing record damage.
A speed selector switch‚ usually located on the side or beneath the platter‚ allows you to choose the appropriate RPM. Ensure the selected speed matches the record’s labeling. Incorrect speed will result in distorted or unusually pitched sound. Regularly check speed accuracy for optimal listening.
Speaker Output Power
Understanding Speaker Power: Crosley record players feature built-in speakers with varying output power‚ typically measured in Watts (W). This wattage indicates the speaker’s ability to deliver sound volume. Higher wattage generally equates to louder sound‚ but also depends on speaker efficiency and audio quality.
Most Crosley models offer between 5W to 15W per channel. For smaller rooms‚ lower wattage is sufficient. Larger spaces may benefit from connecting external speakers via RCA outputs for increased volume and clarity. Avoid excessively high volumes to prevent speaker distortion and potential damage.
Dimensions and Weight
Physical Specifications: Crosley record players come in diverse sizes and weights‚ depending on the model. Suitcase-style players are highly portable‚ typically measuring around 10 x 14 x 6 inches and weighing between 6-10 pounds. Larger‚ traditional cabinet-style models have dimensions of approximately 18 x 16 x 10 inches and weigh 15-20 pounds.
These measurements are approximate; always consult your specific model’s packaging or online specifications for precise details. Weight impacts portability‚ while dimensions determine placement options within your home. Consider these factors when selecting a Crosley player.
Safety Precautions
Important Safety Tips: Handle records with care to prevent scratches. Ensure proper electrical grounding and avoid placing the player in damp environments.
Proper Record Handling
Protecting Your Vinyl: Records are delicate and require careful handling to maintain sound quality and longevity. Always hold records by the edges or the label area‚ avoiding contact with the grooves.
Never place records directly on rough surfaces‚ as this can cause scratches. Store records vertically in their sleeves to prevent warping. Clean records regularly with a carbon fiber brush to remove dust and debris before each play. Avoid excessive pressure when placing the needle on the record.
Proper storage and handling are crucial for preserving your valuable vinyl collection‚ ensuring years of enjoyable listening.
Electrical Safety
Important Precautions: To ensure safe operation‚ always verify the voltage of your power outlet matches the player’s requirements. Never use a damaged power cord; replace it immediately. Avoid operating the record player in damp environments or near water sources.
Do not attempt to disassemble or repair the player yourself‚ as this could result in electric shock or damage. Always unplug the player from the power outlet before cleaning or performing any maintenance. Ensure the power cord is not pinched or strained.
Follow these guidelines to prevent electrical hazards and maintain safe usage.
Preventing Damage to the Player
Care and Protection: Protect your Crosley record player from extreme temperatures‚ direct sunlight‚ and excessive dust. Avoid placing heavy objects on top of the unit‚ which could damage the components. Handle the turntable and tonearm with care‚ as they are delicate parts.
When transporting the player‚ ensure it is securely packaged to prevent internal damage. Do not expose the player to vibrations or shocks. Regularly clean the exterior with a soft‚ dry cloth. Proper handling and maintenance will prolong the life of your record player.
Warranty Information
Coverage Details: Crosley offers a limited warranty against defects in materials and workmanship. Review the warranty card for specific terms and duration of coverage.
Crosley Warranty Details
Limited Warranty Coverage: Crosley record players are warranted against defects in materials and workmanship for a period of one year from the date of original purchase. This warranty covers components that prove defective during normal use‚ as determined by Crosley.
What is Covered: The warranty includes repair or replacement of defective parts‚ including the turntable motor‚ speakers‚ and electronic components. Labor costs associated with warranty repairs are also covered.
What is Not Covered: This warranty does not cover damage resulting from misuse‚ abuse‚ accidents‚ modifications‚ or unauthorized repairs. Normal wear and tear‚ including stylus/needle replacement‚ is also excluded.
Warranty Claim Process: To initiate a warranty claim‚ contact Crosley Customer Support with proof of purchase and a detailed description of the issue.
Contacting Customer Support
Need Assistance? Crosley offers multiple channels for customer support to address any questions or concerns regarding your record player. For frequently asked questions and troubleshooting guides‚ please visit the official Crosley Audio website.
Email Support: You can reach our dedicated support team via email at support@crosleyradio.com. Please include your model number and a detailed description of your issue for a prompt response.
Phone Support: For immediate assistance‚ call our customer support hotline at 1-800-541-4495 during business hours (Monday-Friday‚ 9 AM ⎯ 5 PM EST).
Online Chat: Live chat support is also available on the Crosley Audio website for real-time assistance.

Frequently Asked Questions (FAQ)
Common Issues Addressed: Find solutions to typical problems like power failures‚ distorted sound‚ and Bluetooth connectivity issues within this helpful FAQ section.
Record Player Not Turning On
Troubleshooting Steps: If your Crosley record player fails to power on‚ first verify the power cord is securely connected to both the player and a functioning electrical outlet. Confirm the outlet is delivering power by testing it with another device.
Next‚ check the power switch on the record player itself‚ ensuring it’s in the ‘on’ position. Some models feature a separate power adapter; confirm its connection and functionality. If using batteries‚ ensure they are correctly installed and have sufficient charge.
If the issue persists‚ consult the troubleshooting section of this manual or contact Crosley customer support for further assistance.
Sound Distortion Issues
Addressing Audio Problems: If you experience sound distortion with your Crosley record player‚ several factors could be at play. Begin by inspecting the record itself for scratches or damage‚ as these directly impact audio quality. Ensure the needle is clean and properly aligned; a worn or dirty needle causes distortion.
Check speaker connections‚ verifying they are secure. Adjust the volume level‚ as excessive volume can introduce distortion. If using external speakers‚ confirm their functionality. Experiment with different records to isolate whether the issue is record-specific or player-related.
Bluetooth Connection Problems
Troubleshooting Wireless Pairing: Encountering Bluetooth connection issues? First‚ ensure Bluetooth is enabled on both your Crosley record player and your desired device (smartphone‚ tablet‚ etc.). Verify the player is in pairing mode – consult the ‘Bluetooth Pairing Guide’ section for specific instructions.
Confirm no other devices are actively connected to the record player. Move closer to the player during pairing; distance can interfere with the signal. Restart both devices and attempt pairing again. Check for software updates for both the record player and your connecting device‚ as updates often resolve compatibility issues.